How To Install TTF Fonts in Linux

Screenshot from 2019-04-28 21-38-29.png

I really like the Hack font – it’s used in my terminal apps on MacOS, Linux and even Windows workstations. This short post demonstrates how to install Hack font, but you can use the steps to configure any other TrueType Font (TTF) on your system.

Step 1: Download the TTF font files

In my case, I downloaded the Hack v3 ZIP archive.

Naturally, you need to unpack it:

greys@xps:~/Downloads $ unzip Hack-v3.003-ttf.zip 
Archive: Hack-v3.003-ttf.zip
creating: ttf/
inflating: ttf/Hack-Bold.ttf 
inflating: ttf/Hack-BoldItalic.ttf 
inflating: ttf/Hack-Italic.ttf 
inflating: ttf/Hack-Regular.ttf 
greys@xps:~/Downloads $

Step 2: Copy TTF files into local fonts directory

First you’re going to have to create it in your own homedir:

greys@xps:~/Downloads $ mkdir -p ~/.local/share/fonts 

Now let’s copy the font files into that local fonts directory:

greys@xps:~/Downloads $ ls ttf/* 
45-hack.conf Hack-BoldItalic.ttf Hack-Bold.ttf Hack-Italic.ttf Hack-Regular.ttf 
greys@xps:~/Downloads $ cp ttf/*ttf ~/.local/share/fonts/

Step 3: Refresh fonts cache with fc-cache command

Just run the fc-cache command like this:

greys@xps:~/Downloads $ fc-cache -f -v 

This command will show a list of fonts locations that it inspects and caches for system use. Among the lines of output you can see my home directory:

/usr/share/fonts/type1: caching, new cache contents: 0 fonts, 1 dirs
/usr/share/fonts/type1/gsfonts: caching, new cache contents: 35 fonts, 0 dirs
/usr/X11R6/lib/X11/fonts: skipping, no such directory
/usr/local/share/fonts: caching, new cache contents: 0 fonts, 0 dirs
/home/greys/.local/share/fonts: caching, new cache contents: 4 fonts, 0 dirs
/homee/greys/.fonts: skipping, no such directory
/usr/share/fonts/X11: skipping, looped directory detected

Step 4: Review available fonts

This should now report that your graphics system (X11/Xorg) has access, the list will include the newly installed fonts Hack:

greys@xps:~/Downloads $ fc-list | grep Hack
/storage/greys/.local/share/fonts/Hack-Regular.ttf: Hack:style=Regular 
/storage/greys/.local/share/fonts/Hack-Bold.ttf: Hack:style=Bold 
/storage/greys/.local/share/fonts/Hack-BoldItalic.ttf: Hack:style=Bold Italic 
/storage/greys/.local/share/fonts/Hack-Italic.ttf: Hack:style=Italic

That’s it! Since I wanted this Hack font specifically for terminal use, I went and updated my default profile in GNOME Terminal app:

Screenshot from 2019-04-28 21-30-50.png

to enjoy the font:
Screenshot from 2019-04-28 21-30-17.png

See Also


How To Check SSH Port Status

Screen Shot 2019-04-24 at 01.01.17.png

When you’re configuring new SSH server, it’s possible that connection won’t work right away. That’s when it will be useful for you to know how to check SSH port status.

Use telnet to check SSH port

The easiest approach has traditionally been to use telnet command. It’s also a more universal way of checking SSH port because telnet is usually found in Windows operating system. In fact, you can check any port using telnet.

INTERESTING: Since telnet is an clear text protocol (no encryption), it’s being phased out so it’s quite possible that you won’t find telnet command installed by default in your Linux/Unix system or even modern Windows or MacOS based desktop.

Provided telnet is installed (yum install telnet in CentOS/RedHat/Fedora Linux, for example) though, here’s how you can check SSH port on remote server:

greys@centos:~ $ telnet vps1.unixtutorial.org 22
Trying 51.15.230.209...
Connected to vps1.unixtutorial.org.
Escape character is '^]'.
SSH-2.0-OpenSSH_7.2p2 Ubuntu-4ubuntu2.8
^]^C^]

If you can see  the SSH version information as highlighted above, the SSH port is open and SSH server is functioning properly.

If port 22 is open but SSH server is not listening on it, you’ll get an error like this:

greys@centos:~ $ telnet vps1.unixtutorial.org 22
Trying 163.172.34.149...
telnet: connect to address 163.172.34.149: Connection refused

Verbose ssh command output to check port

My default way of checking remote connectivity is to use ssh command to initiate client connection to remote SSH server using verbose output.

In this example, I’m checking connectivity to vps1 server on port 212:

greys@centos:~ $ ssh -vvv vps1.unixtutorial.org -p 212
OpenSSH_7.4p1, OpenSSL 1.0.2k-fips 26 Jan 2017
debug1: Reading configuration data /etc/ssh/ssh_config
debug1: /etc/ssh/ssh_config line 58: Applying options for *
debug2: resolving "vps1.unixtutorial.org" port 212
debug2: ssh_connect_direct: needpriv 0
debug1: Connecting to vps1.unixtutorial.org [51.15.230.209] port 212.
debug1: connect to address 51.15.230.209 port 212: Connection refused
ssh: connect to host vps1.unixtutorial.org port 212: Connection refused

the same command to a working SSH port will confirm that connection is established:

greys@centos:~ $ ssh -vvv vps1.unixtutorial.org -p 22
OpenSSH_7.4p1, OpenSSL 1.0.2k-fips 26 Jan 2017
debug1: Reading configuration data /etc/ssh/ssh_config
debug1: /etc/ssh/ssh_config line 58: Applying options for *
debug2: resolving "vps1.unixtutorial.org" port 22
debug2: ssh_connect_direct: needpriv 0
debug1: Connecting to vps1.unixtutorial.org [51.15.230.209] port 22.
debug1: Connection established.

That’s it for today!

See Also


Ubuntu 19.04 Released

2019-04-19_22-20-31

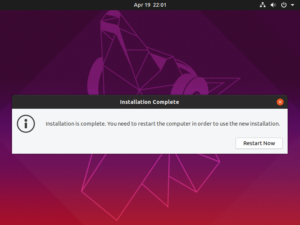
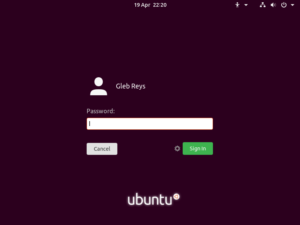
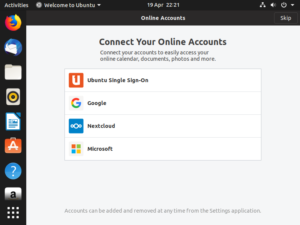
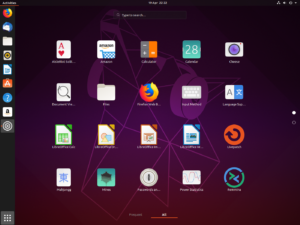
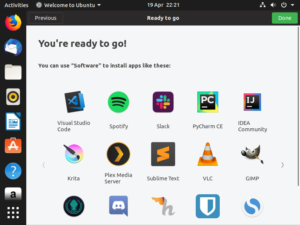
Pretty cool! Next version of Ubuntu, 19.04 (Disco Dingo) has just been released. I couldn’t wait to try it in my VirtualBox setup – seems there are lots of performance improvements that are noticeable even in a virtual machine!

Seems 2GB is the minimum RAM for Ubuntu 19.04

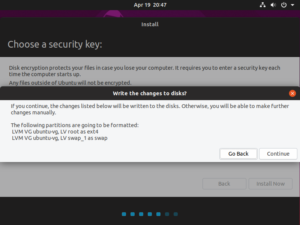
The installer kept freezing on me, I coudln’t understand why. I even upgraded VirtualBox from 6.0.4 to 6.0.6 – quite a few bugs fixed, you know. But this didn’t help with my issue and eventually I realised: Ubuntu 19.04 needs more than 1GB of RAM to work properly. Once I upgraded VM RAM to 2GB, the installer worked just fine:

Ubuntu 19.04 runs on Linux Kernel 5.0.0

One of the reasons Ubuntu 19.04 is promised to be such an improvement performance wise: it’s running on Linux Kernel 5.0.0:

2019-04-19_22-24-07

Have you installed Ubuntu 19.04 yet? What do you think?

See Also


How To: View Windows (CIFS) Shares

I’m working on further configuring the Helios 4 based network storage. Some of network clients I have are Linux systems, some are MacOS based and some are Windows. So it seems I’ll have all the basic network share access commands refreshed in the next few days!

View Shares with smbclient Command

smbclient command isn’t usually installed on Linux system by default, so you will probably need to install it. On my Linux Mint system, I installed it like this:

greys@xps:~$ sudo apt install smbclient

Once installed, smbclient can be used to show network shares by specifying an IP address of the NAS server.

You’re asked for a password but can just press Enter to check public network shares. In my setup I don’t have any public shares, so I typed the password configured on NAS server for my user greys:

greys@xps:~$ smbclient -L 192.168.1.70
WARNING: The "syslog" option is deprecated
Enter WORKGROUP\greys's password:

Sharename      Type      Comment
---------      ----      -------
Storage        Disk      New Stuff
Stuff          Disk      Stuff
TimeMachine    Disk 
home           Disk      Home directory of greys

That’s it for today! Will keep you posted on further progress.

See Also