Ubuntu 19.10

Ubuntu 19.10
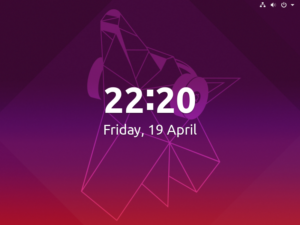
Ubuntu 19.10 Desktop Wallpaper

Ubuntu 19.10 was released on October 17th, which means it’s time to upgrade Ubuntu on my Dell XPS laptop. Please note this is NOT a long-term support (LTS) release, so 19.10 will only be supported until July 2020.


Ubuntu 19.10 – Eoan Ermine

Seems like a pretty solid upgrade:

  • WPA3 support for improved wireless security – need to check if I can upgrade my Ubiquiti equipment to support it
  • Linux Kernel upgraded to 5.3 – this is where I expect majority of improvements for my laptop
  • Dark Theme – in a very short space of just a few months I’m now using dark themes on my iPhone, desktop and laptop, plus in as many apps as support it properly
  • Ubuntu 19.10 is available for Raspberry Pi 4
  • lots of visual improvements in each of the Ubuntu editions – Xubuntu, Kubuntu, Ubuntu MATE

Download Ubuntu 19.10

As always, the best place to start with Ubuntu download is http://releases.ubuntu.com/19.10/

Upgrading to Ubuntu 19.10

I did the usual sequence to get my laptop upgraded. Except the last step which needed the -d option to recognise that Ubuntu 19.10 is available. All of these commands were run through sudo.

  • apt update
  • apt upgrade
  • apt dist-upgrade
  • do-release-upgrade -d

Do you use Ubuntu? When are you planning to upgrade?

See Also


ZFS on root in Ubuntu 19.10

Ubuntu 19.10

Just read about ZFS making it into Ubuntu 19.10 installer as an experimental feature here, sounds pretty cool!

What is ZFS?

ZFS (originally called Zettabyte File System) is a revolutionary filesystem introduced by Sun Microsystems in 2005. ZFS took a few years to crystallise and was eventually shipped with Solaris 10 in 2009. It brought a number of fresh ideas to the world of enterprise storage and ZFS management of filesystems:

  • new parity checking modes, even more reliable than RAID5/RAID6
  • storage pool that can consist of different sized disks (typically you expect all disks to be of the same size and model)
  • self-healing
  • extra focus on the data consistency on disk – meaning ZFS caters for typical software and hardware errors
  • smart implementation and use of filesystem journaling
  • snapshots
  • data deduplication

ZFS in Ubuntu 19.10

To be clear, this is big deal not because ZFS is finally available in Ubuntu – it’s been around for quite some time thanks to the ZFS on Linux project. But this is the first time native support will be available in Ubuntu installer and also allow you to not just ZFS enable data disks but use it for root partition.

See Also


Assign Keyboard Shortcut to Screenshot in Ubuntu

I’m finding myself working on Linux laptop with Ubuntu 19.04 more often than I expected – sometimes I spend most of my day research and preparing Unix Tutorial posts in Linux instead of macOS. Today I got an opportunity to improve my screenshotting productivity a bit more.


How To Take Screenshots in Ubuntu

I tried a few screenshot apps in Ubuntu but eventually settled on the default one that comes pre-installed – it’s called Screenshot. The main reason for this choice wasn’t for its functionality (and certainly not for its performance, it’s rather slow) but because most of other options don’t support the HiDPI resolutions properly – so a quick task of screenshotting something becomes a tedious chore that defeats the purpose.

So I settled on using Screenshot app. I usually press the Start (Windows?) key on my keyboard and this brings a view of all the windows and gives me the app search window at the top of the screen:

I can then type Screenshot there and press Enter to run the app:

And then select the type of screenshot action I want to progress:

Adding Keyboard Shortcut to Screenshot

I decided to improve the things by skipping the whole “search for an app named Screenshot” part of the process and started looking into Keyboard Shortcuts settings.

Turns out, there is an even better option: I can select a shortcut to not just start Screenshot but to also select the action (screenshot current window) and save the file into Pictures directory:

The default shortcut Alt+Print is more than adequate, but on my multimedia keyboard from Logitech I don’t have Print button and must press Fn for invoke it. So I decided to change the default shortcut to Alt+S:

That’s it, I now can simply press Alt+S and get the window I’m working with automatically screenshotted (is this a word?) and placed into Pictures:

Hope you like this tip, have a great day!

See Also


How To: Upgrade Packages That Were Kept Back

ubuntu-linux-logo

Now and then you may notice that apt-get upgrade command keeps a few packages back, meaning they don’t get upgraded. This quick post shows what you can do about it and how to get all the packages upgraded.

How apt-get Keeps Packages Back

This is how keeping packages back will look like:

greys@xps:~ $ sudo apt-get upgrade
Reading package lists... Done
Building dependency tree
Reading state information... Done
Calculating upgrade... Done
The following packages have been kept back:
linux-generic linux-headers-generic linux-image-generic
0 to upgrade, 0 to newly install, 0 to remove and 3 not to upgrade.

Why Packages Are Kept Back by apt-get

Most likely reason for keeping packages back is that upgrading them means installing new packages or removing existing ones. apt-get upgrade strictly upgrades existing packages, without removing or installing anything.

Since the command you’re giving to apt-get is upgrade and not to install new packages, packages that require some old packages removed or new packages installed are kept back.

How To Upgrade Packages That Were Kept Back

Simply use the dist-upgrade option of apt-get, which will resolve dependencies and install/remove dependent package as needed:

greys@xps:~ $ sudo apt-get dist-upgrade
Reading package lists... Done
Building dependency tree
Reading state information... Done
Calculating upgrade... Done
The following NEW packages will be installed
linux-headers-5.0.0-20 linux-headers-5.0.0-20-generic linux-image-5.0.0-20-generic linux-modules-5.0.0-20-generic
linux-modules-extra-5.0.0-20-generic
The following packages will be upgraded:
linux-generic linux-headers-generic linux-image-generic
3 to upgrade, 5 to newly install, 0 to remove and 0 not to upgrade.
Need to get 67.0 MB of archives.
After this operation, 334 MB of additional disk space will be used.
Do you want to continue? [Y/n] y

That’s it for todat, enjoy!

See Also


Card Reader Issues in Ubuntu 19.04 on Dell XPS 13 9380

unix-tutorial

It appears there’s a long-standing malfunction of various microSD card readers running Linux. In my particular case, the issue happens on XPS 13 9380 laptop running latest Ubuntu 19.04 with all the updates as of early July 2019. I’ll update this post once I confirm the fix.

Card Reader Device on Dell XPS 13 9380

I believe this is the device I have have:

root@xps:~ #  lspci | grep -i reader
01:00.0 Unassigned class [ff00]: Realtek Semiconductor Co., Ltd. RTS525A PCI Express Card Reader (rev 01)

mmc0: error -110 whilest initialising SD card

The error message is a bit strange: I’m not trying to initialise my SD card, but instead want to read it. It’s a pretty standard 128GB microSD by SanDisk, but I think part of the problem is that it’s a high-speed SDXC card and the issue is that card reader can’t support the card because it’s running on slower speeds by default.

Here’s how the error looks:

Jul 2 14:02:43 xps kernel: [18743.768947] mmc0: error -110 whilst initialising SD card
Jul 2 14:02:44 xps kernel: [18745.108865] mmc0: error -110 whilst initialising SD card
Jul 2 14:02:46 xps kernel: [18746.452902] mmc0: error -110 whilst initialising SD card

Reloading SDHCI Kernel Module with debug_quirks

One of the common fixes for the problem is to reload kernel module sdhci with debug parameters that assist with improved voltage required for higher speeds.

Unfortunately, this fix didn’t work for me:

$ sudo modprobe sdhci debug_quirks2="0x80000000"

Syslog reports that module has been reloaded:

Jul 06 12:22:01 xps kernel: sdhci: Secure Digital Host Controller Interface driver 
Jul 06 12:22:01 xps kernel: sdhci: Copyright(c) Pierre Ossman

… but when I insert the code I still get the same error:

Jul 06 12:24:43 xps kernel: mmc0: error -110 whilst initialising SD card
Jul 06 12:24:45 xps kernel: mmc0: error -110 whilst initialising SD card
Jul 06 12:24:46 xps kernel: mmc0: error -110 whilst initialising SD card

I’m glad I also have an external card reader with USB-C interface, it works just fine with perfect access to the same microSD card. But ideally I want to fix this issue for the build-in card reader.

See Also


Ubuntu 19.04 Released

2019-04-19_22-20-31

Pretty cool! Next version of Ubuntu, 19.04 (Disco Dingo) has just been released. I couldn’t wait to try it in my VirtualBox setup – seems there are lots of performance improvements that are noticeable even in a virtual machine!

Seems 2GB is the minimum RAM for Ubuntu 19.04

The installer kept freezing on me, I coudln’t understand why. I even upgraded VirtualBox from 6.0.4 to 6.0.6 – quite a few bugs fixed, you know. But this didn’t help with my issue and eventually I realised: Ubuntu 19.04 needs more than 1GB of RAM to work properly. Once I upgraded VM RAM to 2GB, the installer worked just fine:

Ubuntu 19.04 runs on Linux Kernel 5.0.0

One of the reasons Ubuntu 19.04 is promised to be such an improvement performance wise: it’s running on Linux Kernel 5.0.0:

2019-04-19_22-24-07

Have you installed Ubuntu 19.04 yet? What do you think?

See Also


Automatically Remove Packages in Ubuntu

It is possible that removing some packages on your Debian, Ubuntu or Mint Linux system will leave a number of software packages behind. Although they are not required by any existing package, they are still kept until you implicitly remove them.

Packages That Are No Longer Required

You will probably see a message like this every time when you’re running apt or apt-get command (using sudo, of course):

The following packages were automatically installed and are no longer required:
...
Use 'sudo apt autoremove' to remove them.

This happens when you run apt/apt-get for any reason. For instance, I’m trying to install a PCAP library, but look at all the packages that can be autoremoved:

greys@xps:/home/greys$ sudo apt install libpcap-dev
Reading package lists... Done
Building dependency tree 
Reading state information... Done
The following packages were automatically installed and are no longer required:
adobe-flashplugin cabextract chromium-codecs-ffmpeg-extra gstreamer1.0-vaapi libaribb24-0 libavcodec-extra
libbasicusageenvironment1 libcddb2 libdrm-dev libdvbpsi10 libebml4v5 libegl1-mesa-dev libgl1-mesa-dev libgles1
libgles2-mesa-dev libglu1-mesa-dev libglvnd-core-dev libglvnd-dev libgroupsock8 libhal1-flash libhunspell-dev
libjs-jquery libjs-jquery-scrollto liblivemedia62 liblua5.2-0 libmad0 libmatroska6v5 libmicrodns0 libminizip1
libmspack0 libnfs11 libopengl0 libopenmpt-modplug1 libplacebo4 libprotobuf-lite10 libpthread-stubs0-dev
libresid-builder0c2a libsdl-image1.2 libsidplay2 libssh2-1 libunshield0 libupnp6 libusageenvironment3 libva-wayland2
libvlc-bin libvlc5 libvlccore9 libwayland-bin libwayland-dev libx11-dev libx11-xcb-dev libxau-dev libxcb-dri2-0-dev
libxcb-dri3-dev libxcb-glx0-dev libxcb-present-dev libxcb-randr0-dev libxcb-render0-dev libxcb-shape0-dev
libxcb-sync-dev libxcb-xfixes0-dev libxcb1-dev libxdamage-dev libxdmcp-dev libxext-dev libxfixes-dev
libxshmfence-dev libxxf86vm-dev mesa-common-dev qt5-qmake qt5-qmake-bin qtchooser sigil-data unshield vlc-bin
vlc-data vlc-l10n vlc-plugin-base vlc-plugin-notify vlc-plugin-video-output x11proto-core-dev x11proto-damage-dev
x11proto-dev x11proto-fixes-dev x11proto-xext-dev x11proto-xf86vidmode-dev xorg-sgml-doctools xtrans-dev
Use 'sudo apt autoremove' to remove them.
The following additional packages will be installed:
libpcap0.8-dev
The following NEW packages will be installed:
libpcap-dev libpcap0.8-dev
0 upgraded, 2 newly installed, 0 to remove and 251 not upgraded.
Need to get 221 kB of archives.
After this operation, 748 kB of additional disk space will be used.
Do you want to continue? [Y/n] n
Abort.

Use apt autoremove to uninstall software packages

As suggested, this is what happens when I run apt autoremove:

greys@xps:/home/greys$ sudo apt autoremove
Reading package lists... Done
Building dependency tree 
Reading state information... Done
The following packages will be REMOVED:
adobe-flashplugin cabextract chromium-codecs-ffmpeg-extra gstreamer1.0-vaapi libaribb24-0 libavcodec-extra
libbasicusageenvironment1 libcddb2 libdrm-dev libdvbpsi10 libebml4v5 libegl1-mesa-dev libgl1-mesa-dev libgles1
libgles2-mesa-dev libglu1-mesa-dev libglvnd-core-dev libglvnd-dev libgroupsock8 libhal1-flash libhunspell-dev
libjs-jquery libjs-jquery-scrollto liblivemedia62 liblua5.2-0 libmad0 libmatroska6v5 libmicrodns0 libminizip1
libmspack0 libnfs11 libopengl0 libopenmpt-modplug1 libplacebo4 libprotobuf-lite10 libpthread-stubs0-dev
libresid-builder0c2a libsdl-image1.2 libsidplay2 libssh2-1 libunshield0 libupnp6 libusageenvironment3 libva-wayland2
libvlc-bin libvlc5 libvlccore9 libwayland-bin libwayland-dev libx11-dev libx11-xcb-dev libxau-dev libxcb-dri2-0-dev
libxcb-dri3-dev libxcb-glx0-dev libxcb-present-dev libxcb-randr0-dev libxcb-render0-dev libxcb-shape0-dev
libxcb-sync-dev libxcb-xfixes0-dev libxcb1-dev libxdamage-dev libxdmcp-dev libxext-dev libxfixes-dev
libxshmfence-dev libxxf86vm-dev mesa-common-dev qt5-qmake qt5-qmake-bin qtchooser sigil-data unshield vlc-bin
vlc-data vlc-l10n vlc-plugin-base vlc-plugin-notify vlc-plugin-video-output x11proto-core-dev x11proto-damage-dev
x11proto-dev x11proto-fixes-dev x11proto-xext-dev x11proto-xf86vidmode-dev xorg-sgml-doctools xtrans-dev
0 upgraded, 0 newly installed, 88 to remove and 251 not upgraded.
After this operation, 131 MB disk space will be freed.
Do you want to continue? [Y/n] y
(Reading database ... 270228 files and directories currently installed.)
Removing adobe-flashplugin (1:20190212.1-0ubuntu0.18.04.1) ...
Removing cabextract (1.6-1.1) ...
Removing chromium-codecs-ffmpeg-extra (71.0.3578.98-0ubuntu0.18.04.1) ...
Removing gstreamer1.0-vaapi:amd64 (1.14.1-1~ubuntu18.04.1) ...
Removing vlc-plugin-base:amd64 (3.0.4-1ubuntu0.2) ...
Removing libaribb24-0:amd64 (1.0.3-1) ...
Removing libavcodec-extra (7:3.4.4-0ubuntu0.18.04.1) ...
Removing libbasicusageenvironment1:amd64 (2018.02.18-1) ...
Removing libcddb2 (1.3.2-5fakesync1) ...
Removing libgles2-mesa-dev:amd64 (18.2.2-0ubuntu1~18.04.2) ...
Removing libegl1-mesa-dev:amd64 (18.2.2-0ubuntu1~18.04.2) ...
Removing libglu1-mesa-dev:amd64 (9.0.0-2.1build1) ...
Removing libgl1-mesa-dev:amd64 (18.2.2-0ubuntu1~18.04.2) ...
Removing mesa-common-dev:amd64 (18.2.2-0ubuntu1~18.04.2) ...
Removing libdrm-dev:amd64 (2.4.95-1~18.04.1) ...
Removing libdvbpsi10:amd64 (1.3.2-1) ...
Removing libmatroska6v5:amd64 (1.4.8-1.1) ...
Removing libebml4v5:amd64 (1.3.5-2) ...
Removing libglvnd-dev:amd64 (1.0.0-2ubuntu2.2) ...
Removing libgles1:amd64 (1.0.0-2ubuntu2.2) ...
Removing libglvnd-core-dev:amd64 (1.0.0-2ubuntu2.2) ...
Removing libgroupsock8:amd64 (2018.02.18-1) ...
Removing libhal1-flash (0.3.3-2) ...
Removing libhunspell-dev:amd64 (1.6.2-1) ...
Removing libjs-jquery-scrollto (2.1.2+dfsg-4) ...
Removing libjs-jquery (3.2.1-1) ...
Removing liblivemedia62:amd64 (2018.02.18-1) ...
Removing liblua5.2-0:amd64 (5.2.4-1.1build1) ...
Removing libmad0:amd64 (0.15.1b-9ubuntu18.04.1) ...
Removing libmicrodns0:amd64 (0.0.8-1) ...
Removing libminizip1:amd64 (1.1-8build1) ...
Removing libmspack0:amd64 (0.6-3ubuntu0.2) ...
Removing libnfs11:amd64 (2.0.0-1~exp1) ...
Removing libopengl0:amd64 (1.0.0-2ubuntu2.2) ...
Removing libopenmpt-modplug1:amd64 (0.3.6-1) ...
Removing vlc-plugin-video-output:amd64 (3.0.4-1ubuntu0.2) ...
Removing libplacebo4:amd64 (0.4.0-2) ...
Removing libprotobuf-lite10:amd64 (3.0.0-9.1ubuntu1) ...
Removing libx11-xcb-dev:amd64 (2:1.6.4-3ubuntu0.2) ...
Removing libxxf86vm-dev:amd64 (1:1.1.4-1) ...
Removing libresid-builder0c2a (2.1.1-15ubuntu1) ...
Removing libsdl-image1.2:amd64 (1.2.12-8) ...
Removing libsidplay2 (2.1.1-15ubuntu1) ...
Removing libssh2-1:amd64 (1.8.0-1) ...
Removing unshield (1.4.2-1) ...
Removing libunshield0:amd64 (1.4.2-1) ...
Removing libupnp6:amd64 (1:1.6.24-4) ...
Removing libusageenvironment3:amd64 (2018.02.18-1) ...
Removing libva-wayland2:amd64 (2.1.0-3) ...
Removing vlc-bin (3.0.4-1ubuntu0.2) ...
Removing libvlc-bin:amd64 (3.0.4-1ubuntu0.2) ...
Removing libvlc5:amd64 (3.0.4-1ubuntu0.2) ...
Removing vlc-plugin-notify:amd64 (3.0.4-1ubuntu0.2) ...
Removing libvlccore9:amd64 (3.0.4-1ubuntu0.2) ...
Removing libwayland-dev:amd64 (1.16.0-1ubuntu1.1~18.04.1) ...
Removing libwayland-bin (1.16.0-1ubuntu1.1~18.04.1) ...
Removing libxcb-dri2-0-dev:amd64 (1.13-1) ...
Removing libxcb-dri3-dev:amd64 (1.13-1) ...
Removing libxcb-glx0-dev:amd64 (1.13-1) ...
Removing libxcb-present-dev:amd64 (1.13-1) ...
Removing libxcb-randr0-dev:amd64 (1.13-1) ...
Removing libxcb-xfixes0-dev:amd64 (1.13-1) ...
Removing libxcb-render0-dev:amd64 (1.13-1) ...
Removing libxcb-shape0-dev:amd64 (1.13-1) ...
Removing libxcb-sync-dev:amd64 (1.13-1) ...
Removing libxdamage-dev:amd64 (1:1.1.4-3) ...
Removing libxext-dev:amd64 (2:1.3.3-1) ...
Removing libxfixes-dev:amd64 (1:5.0.3-1) ...
Removing libxshmfence-dev:amd64 (1.3-1) ...
Removing qt5-qmake:amd64 (5.9.5+dfsg-0ubuntu1) ...
Removing qt5-qmake-bin (5.9.5+dfsg-0ubuntu1) ...
Removing qtchooser (64-ga1b6736-5) ...
Removing sigil-data (0.9.12+dfsg-1ubuntu1804) ...
Removing vlc-data (3.0.4-1ubuntu0.2) ...
Removing vlc-l10n (3.0.4-1ubuntu0.2) ...
Removing x11proto-damage-dev (1:2018.4-4) ...
Removing x11proto-xf86vidmode-dev (2018.4-4) ...
Removing x11proto-xext-dev (2018.4-4) ...
Removing x11proto-fixes-dev (1:2018.4-4) ...
Removing libx11-dev:amd64 (2:1.6.4-3ubuntu0.2) ...
Removing libxcb1-dev:amd64 (1.13-1) ...
Removing libpthread-stubs0-dev:amd64 (0.3-4) ...
Removing libxau-dev:amd64 (1:1.0.8-1) ...
Removing libxdmcp-dev:amd64 (1:1.1.2-3) ...
Removing x11proto-core-dev (2018.4-4) ...
Removing x11proto-dev (2018.4-4) ...
Removing xorg-sgml-doctools (1:1.11-1) ...
Removing xtrans-dev (1.3.5-1) ...
Processing triggers for sgml-base (1.29) ...
Processing triggers for mintsystem (8.4.1) ...
Processing triggers for libc-bin (2.27-3ubuntu1) ...
Processing triggers for man-db (2.8.3-2ubuntu0.1) ...
Processing triggers for hicolor-icon-theme (0.17-2) ...
greys@xps:/dist/wireshark/wireshark-ninja$

Just to finish this brief example, here’s what happens when I try the same apt install command again. Note how there are no more packages suggested for auto-remove:

greys@xps:/home/greys$ sudo apt install libpcap-dev
Reading package lists... Done
Building dependency tree 
Reading state information... Done
The following additional packages will be installed:
libpcap0.8-dev
The following NEW packages will be installed:
libpcap-dev libpcap0.8-dev
0 upgraded, 2 newly installed, 0 to remove and 251 not upgraded.
Need to get 221 kB of archives.
After this operation, 748 kB of additional disk space will be used.
Do you want to continue? [Y/n]

See Also


screenFetch in Linux Mint

screenfetch-linux-mint-19-1-xps.png

Great stuff, I have just installed Linux Mint 19.1 on my Dell XPS 13 laptop! Naturally, one of the first things to be run is the screenFetch utility.

Install screenFetch on Linux Mint

Based on Ubuntu Linux, Linux Mint enjoys abundant software repositories, which means it’s super easy to install screenFetch on the new system:

root@xps:~# apt-get install screenfetch
Reading package lists... Done
Building dependency tree 
Reading state information... Done
Recommended packages:
scrot
The following NEW packages will be installed:
screenfetch
0 upgraded, 1 newly installed, 0 to remove and 245 not upgraded.
Need to get 50.6 kB of archives.
After this operation, 236 kB of additional disk space will be used.
Get:1 http://archive.ubuntu.com/ubuntu bionic/universe amd64 screenfetch all 3.8.0-8 [50.6 kB]
Fetched 50.6 kB in 0s (308 kB/s) 
Selecting previously unselected package screenfetch.
(Reading database ... 249721 files and directories currently installed.)
Preparing to unpack .../screenfetch_3.8.0-8_all.deb ...
Unpacking screenfetch (3.8.0-8) ...
Setting up screenfetch (3.8.0-8) ...
Processing triggers for man-db (2.8.3-2ubuntu0.1) ...

screenFetch in Linux Mint 19.1

This is the output of screenFetch on my laptop:

screenfetch-linux-mint-19-1-xps.png

See Also


Ubiquiti UniFi controller on Ubuntu 18.10

I have a tiny server in home office, it used to be a Window 8 based entertainment box but I reinstalled it with Ubuntu 18.10 recently enough to run home automation. There has’t been any particular function assigned to this server but I have finally decided what role it will play: it will be an always-on Ubiquiti UniFi controller for my home office network!

My Ubuntu 18.10 server parameters

Like I said, it’s a fairly modest hardware and not a server grade at all. But thanks to 64-bit support (UEFI 32-bit boot though!) and low power consumtion, this is a perfect system for the always-on server:

  • Processor: Intel(R) Atom(TM) CPU Z3735F @ 1.33GHz – quad-core
  • RAM: 2GB 1333Mhz
  • Storage: internal 32GB flash storage
  • Operating System: custom Ubuntu 18.10 (64-bit OS but with 32-bit boot loader)

UniFi Network Management Controller

Ubiquiti have a few ranges of hardware, and I’m a big fan of the UniFi series of Software-Defined Networking (SDN) – very easy to setup and manager, plus you get quite a few updates via firmware, without having to change the hardware.

Network Management Controller is a piece of software or hardware that is running UniFi controller software that keeps track of all your UniFi devices and configurations. It has its own database for keeping track of settings and states and accepts network (browser or app) connections for remote management.

The mobile app for remote management is pretty cool.

UniFi Appliances I use in my Home Office

Ubiquiti Security Gateway (USG)

Wonderful little device for powerful traffic management, remote access (VPN) deployment and deep packet inspection (DPI) for visual understanding of how your network clients are consuming Internet traffic.

Ubiquiti UniFi Switch 8 60W (US-8-60W)

I have a number of switches like this, they’re great for building out a small office network and integrate with Network Management Console – meaning you see traffic and port status.

I also really like that this switch has 4 PoE (Power over Ethernet) ports, so you can plug in IP cameras and WiFi hotspots that support PoE – means you don’t need to run a separate power cable for them.

Installing UniFi Controller with installation scripts

Although there are official software repositories and RPM/DEB file downloads available from Ubiquiti, they’re kind of awkward to use: you still need to resolve software dependencies and preinstall a bunch of stuff.

So after a bit of researching online, I found that Glenn R from Ubiquiti’s community forums has prepared scripts for automatic installation of UniFi controller: UniFi Installation Scripts.

There’s a script available for the most recent Debian and Ubuntu builds, so if you want to install controller software on Ubuntu 16.04, Ubuntu 18.04, Ubuntu 18.10, Debian 8 or Debian 9 – there’s no better way that using one of these scripts.

The procedure is simple:

  1. Go to the UniFi Installation Scripts page
  2. Download the script for your controller version (5.9.x is the stable branch) and operating system
  3. Make the downloaded script executable (chmod +x unifi-5.9.29.sh)
  4. Execute the script as root
  5. Enjoy! (browse to your server’s IP address and port 8443)

Here’s how my end result looks:

Screen Shot 2019-02-07 at 17.15.29.png

Do you use UniFi? Want to learn more about configuring or managing UniFi solutions? Let me know and I will wite a few follow-up posts.


How To List Files in Ubuntu/Debian Package

dpkg -L


If you’re ever looking for a specific list of files included with one of the packages on your Ubuntu/Debian/Mint Linux setup, here’s how you can do it using the dpkg command:

# dpkg --listfiles libcurl4-openssl-dev
/.
/usr
/usr/lib
/usr/lib/x86_64-linux-gnu
/usr/lib/x86_64-linux-gnu/pkgconfig
/usr/lib/x86_64-linux-gnu/pkgconfig/libcurl.pc
/usr/lib/x86_64-linux-gnu/libcurl.a
/usr/lib/x86_64-linux-gnu/libcurl.la
/usr/share
/usr/share/doc
/usr/share/doc/libcurl4-openssl-dev
/usr/share/doc/libcurl4-openssl-dev/copyright
/usr/share/man
/usr/share/man/man1
/usr/share/man/man1/curl-config.1.gz
/usr/share/aclocal
/usr/share/aclocal/libcurl.m4
/usr/include
/usr/include/curl
/usr/include/curl/curlver.h
/usr/include/curl/mprintf.h
/usr/include/curl/stdcheaders.h
/usr/include/curl/easy.h
/usr/include/curl/curlrules.h
/usr/include/curl/multi.h
/usr/include/curl/curlbuild.h
/usr/include/curl/typecheck-gcc.h
/usr/include/curl/curl.h
/usr/bin
/usr/bin/curl-config
/usr/lib/x86_64-linux-gnu/libcurl.so
/usr/share/doc/libcurl4-openssl-dev/changelog.Debian.gz
/usr/share/doc/libcurl4-openssl-dev/NEWS.Debian.gz

The same can also be done with the shorter version of the command line option: dpkg -L

One of the most typical things to check next would be to verify the integrity of all these files in the package – usually dpkg keeps checksums for all the files installed.

Verifying integrity of files instlaled by the package:

# dpkg --verify libcurl4-openssl-dev
??5?????? /usr/include/curl/curl.h

In this example I have gone and edited the comment in the curl.h header file, just to change it enough for dpkg to pick it up. Since checksums are used for highlighting differences and also because most of package installed files are binaries or special non-cleartext formats, you don’t see the text-based diff but instead just get an indication that certain file differs from the original version installed by dpkg.

The shorter version of the same is dpkg -V.